How to Integrate DenserRetriever into GPT Store
Introduction
In the world of AI, a "retriever" is a tool used to sift through vast amounts of data to find information that is relevant to a user's query. Think of it as a highly intelligent search engine that helps AI systems understand and gather the exact information needed to answer questions effectively. The Retriever is the cornerstone of the Retriever Augmented Generation (RAG) framework, playing a crucial role in delivering an accurate and seamless experience in AI applications.
Create your own DenserRetriever
Register account
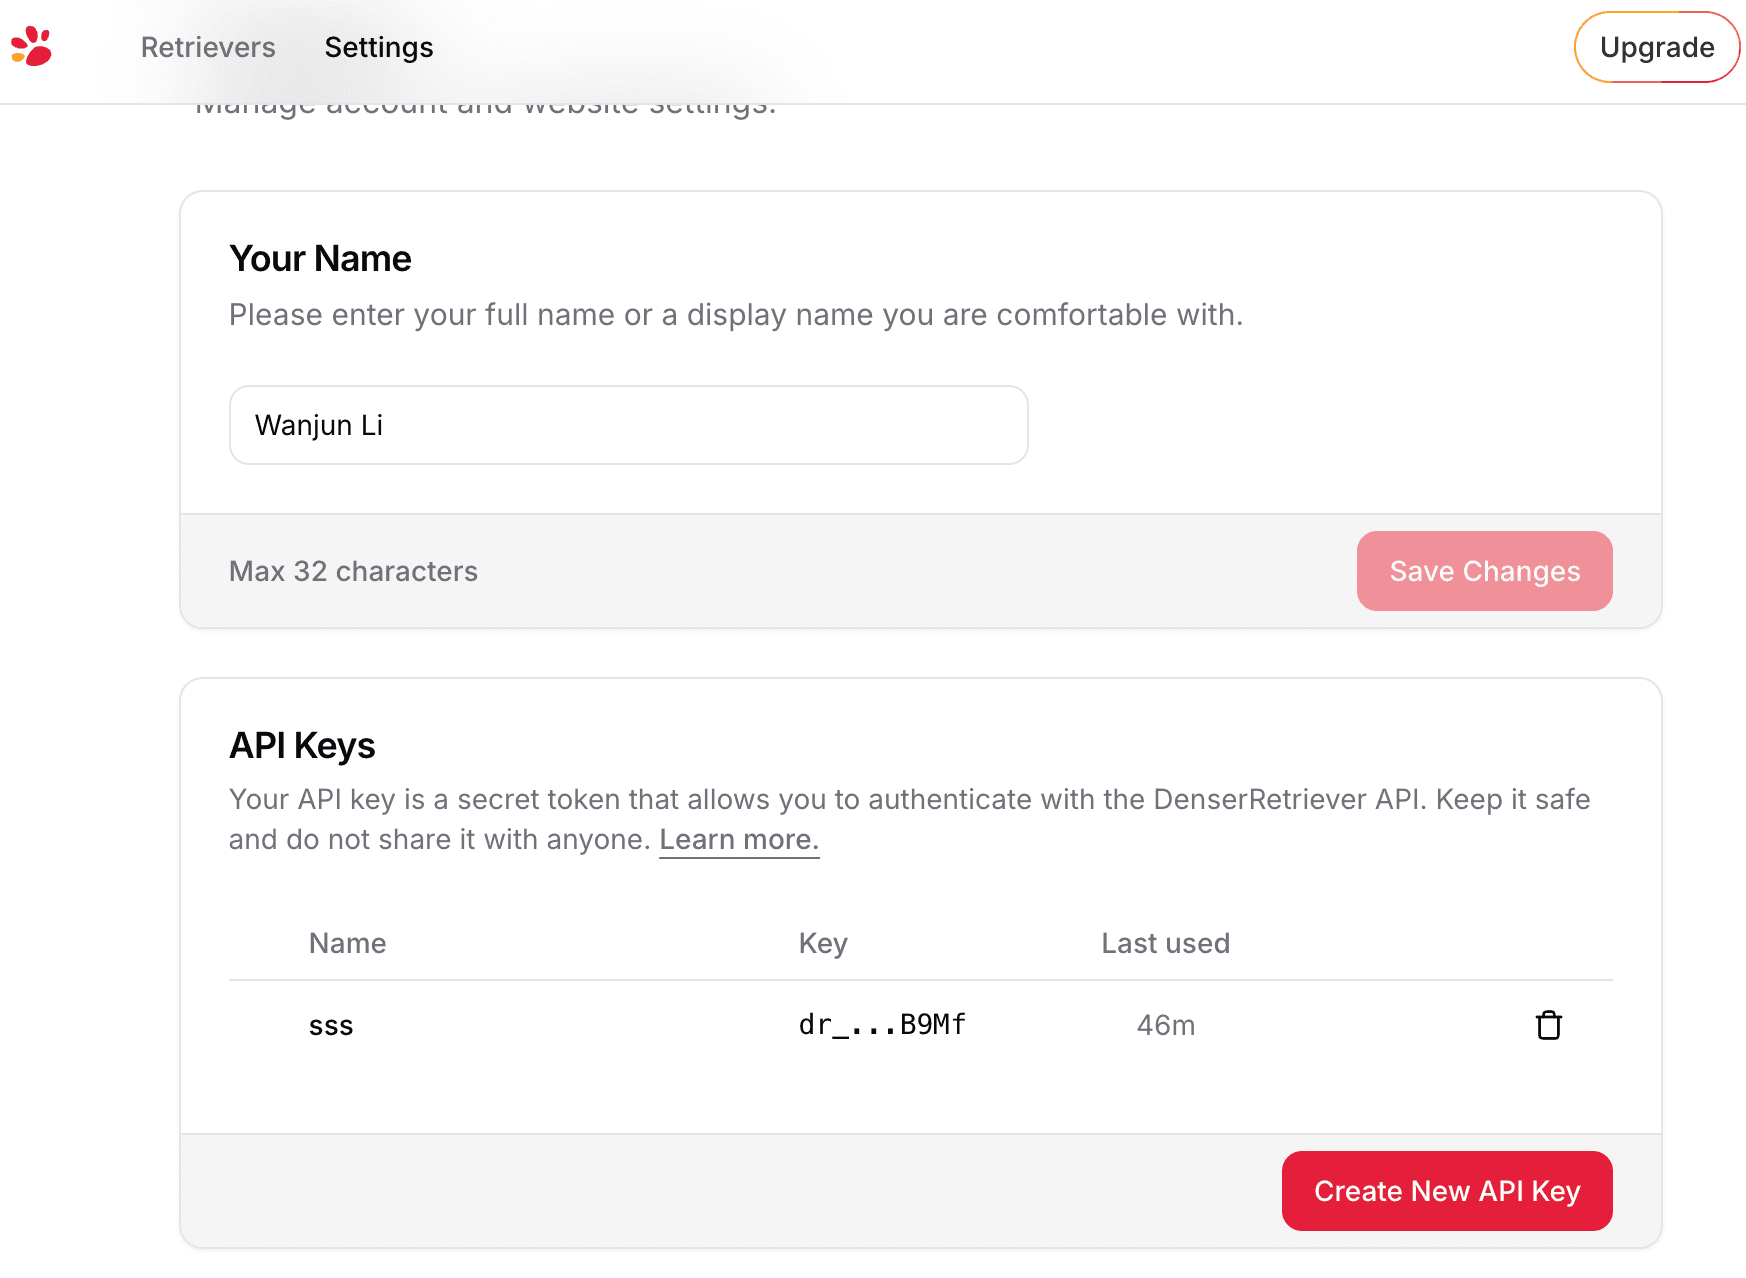
Visit DenserRetriever to sign up if you don't have an account. Go to the Settings page, where you will see API keys. Click "Create New API Key" to get your API key. Save it in a secure place.
Create Retriever
Returning to the Retrievers section, you will need to click on the Add Retriever button to begin the process.
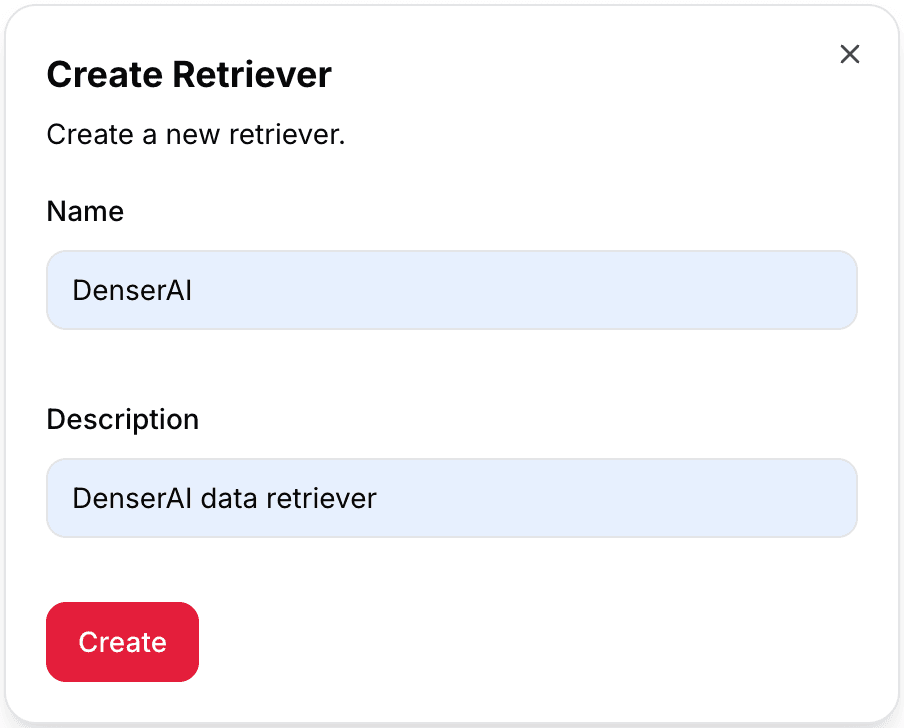
This feature allows you to customize and manage your data storage efficiently. You can add various types of data, including webpages, files, text documents, and more. By doing so, you can ensure that all your important information is organized and easily accessible whenever you need it.
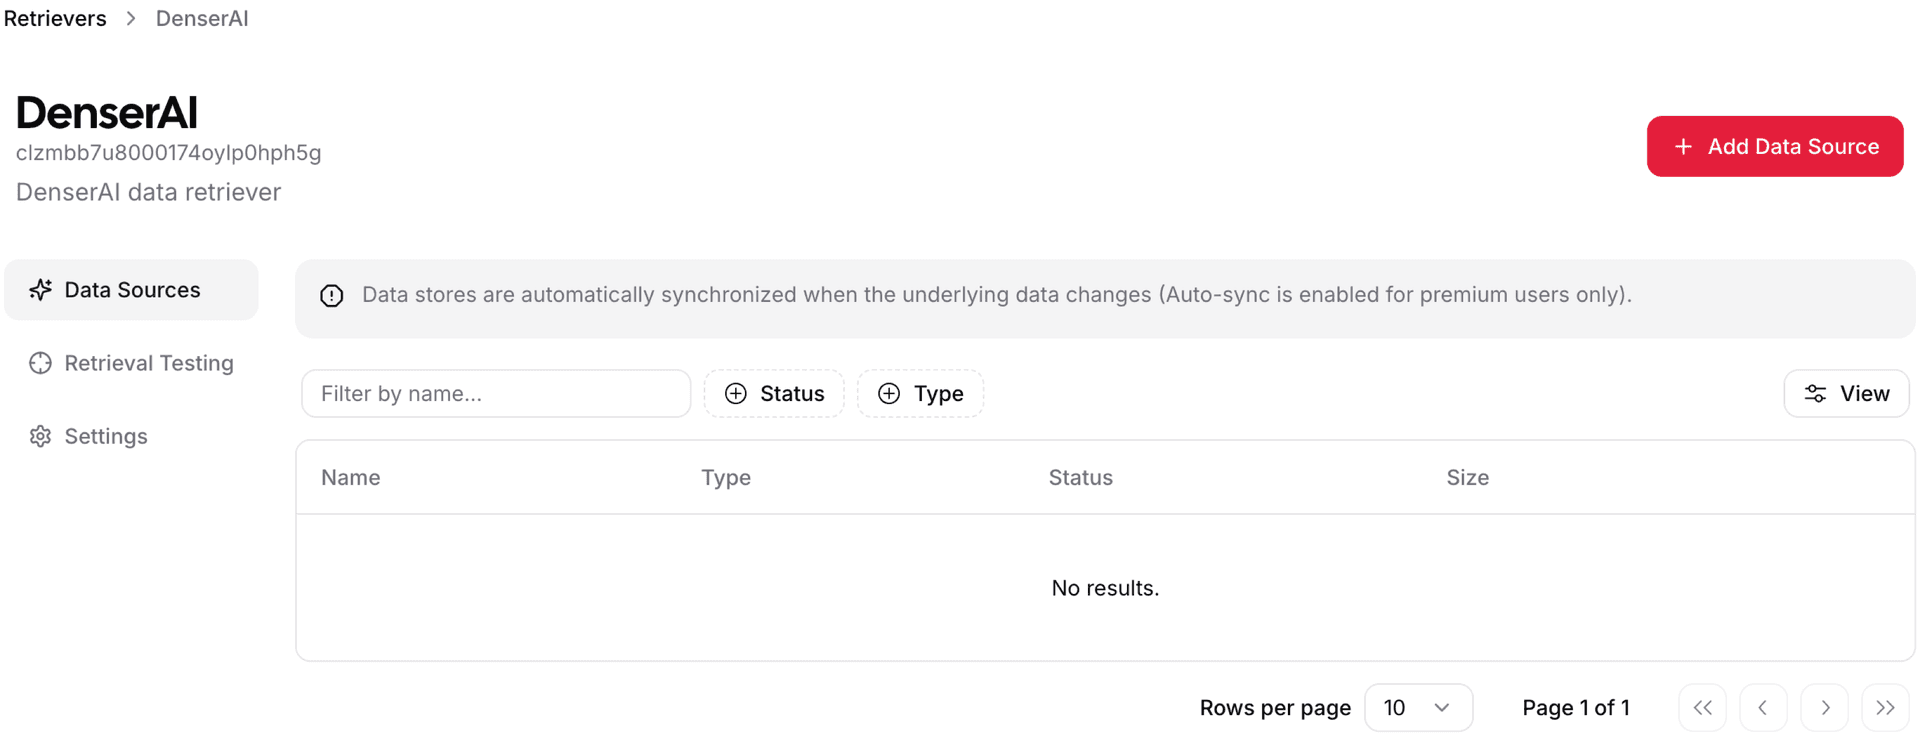
Add Your own Data Source
Now You can then add your own data by selecting the data type (e.g. WebPage, File, Text) and providing the relevant details. After adding your data, the retriever will start processing and indexing it for future queries.
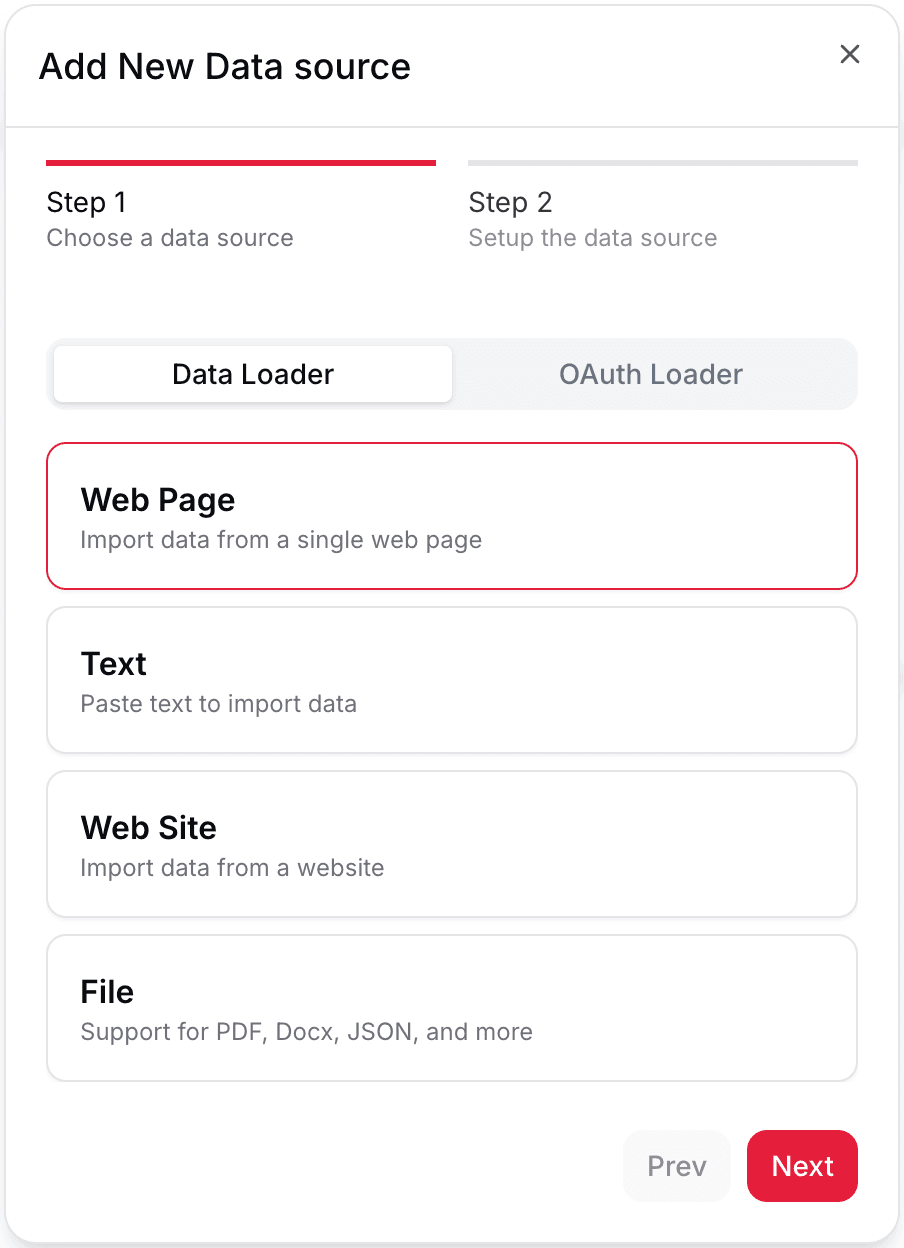
Here, we add the denser.ai website as an example.
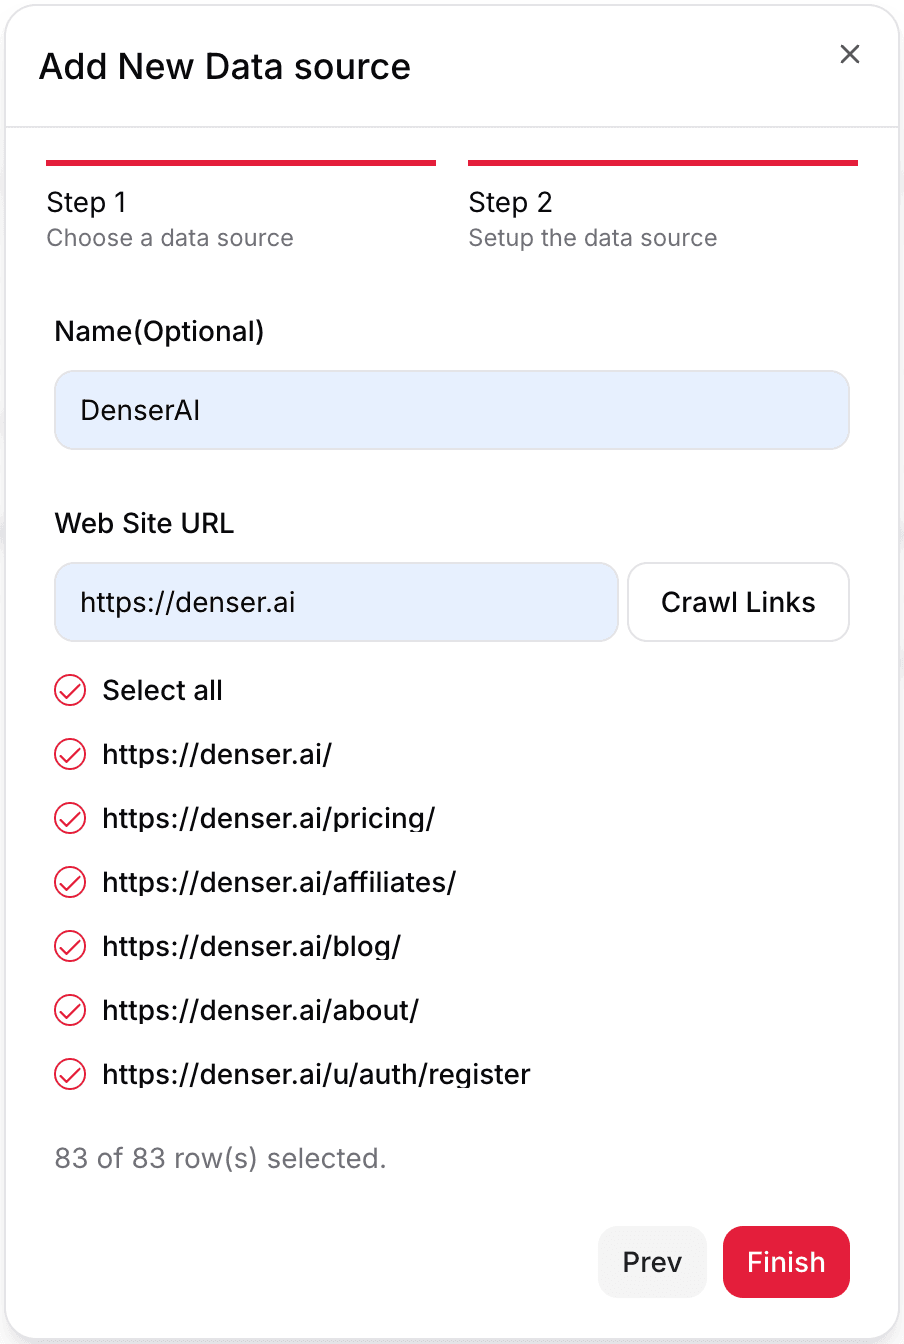
Click the finish button. All the webpage sources will be indexed by DenserRetriever in a few minutes.
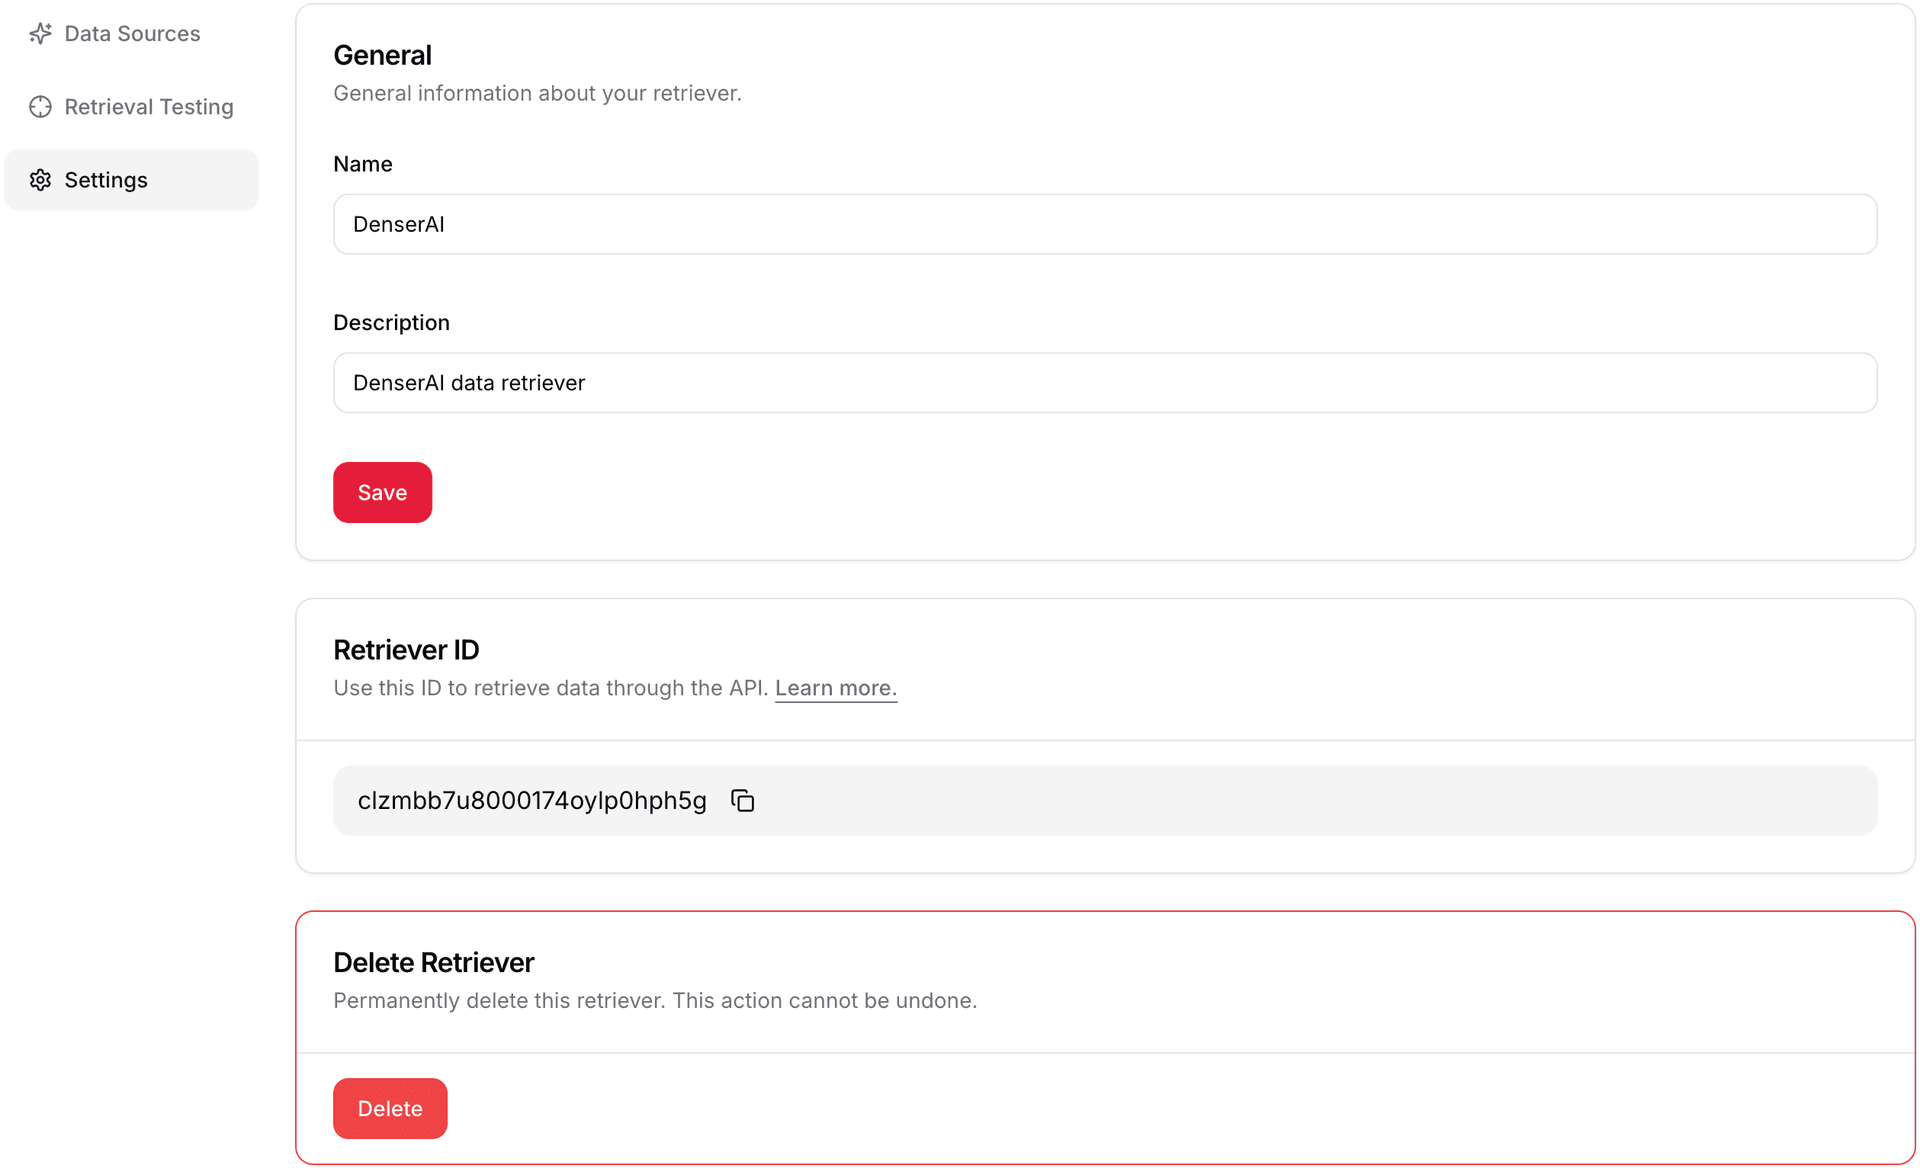
Copy Retriever ID
That's all. Now you can copy your Retriever ID in settings.
Create your custom GPTs
💡 Note that you need a ChatGPT plus account to conduct the tests outlined in the page, as GPT-4 model access requires a ChatGPT plus account.
Once you finish the steps in the last section, you can build your custom GPTs.
Add GPT actions
-
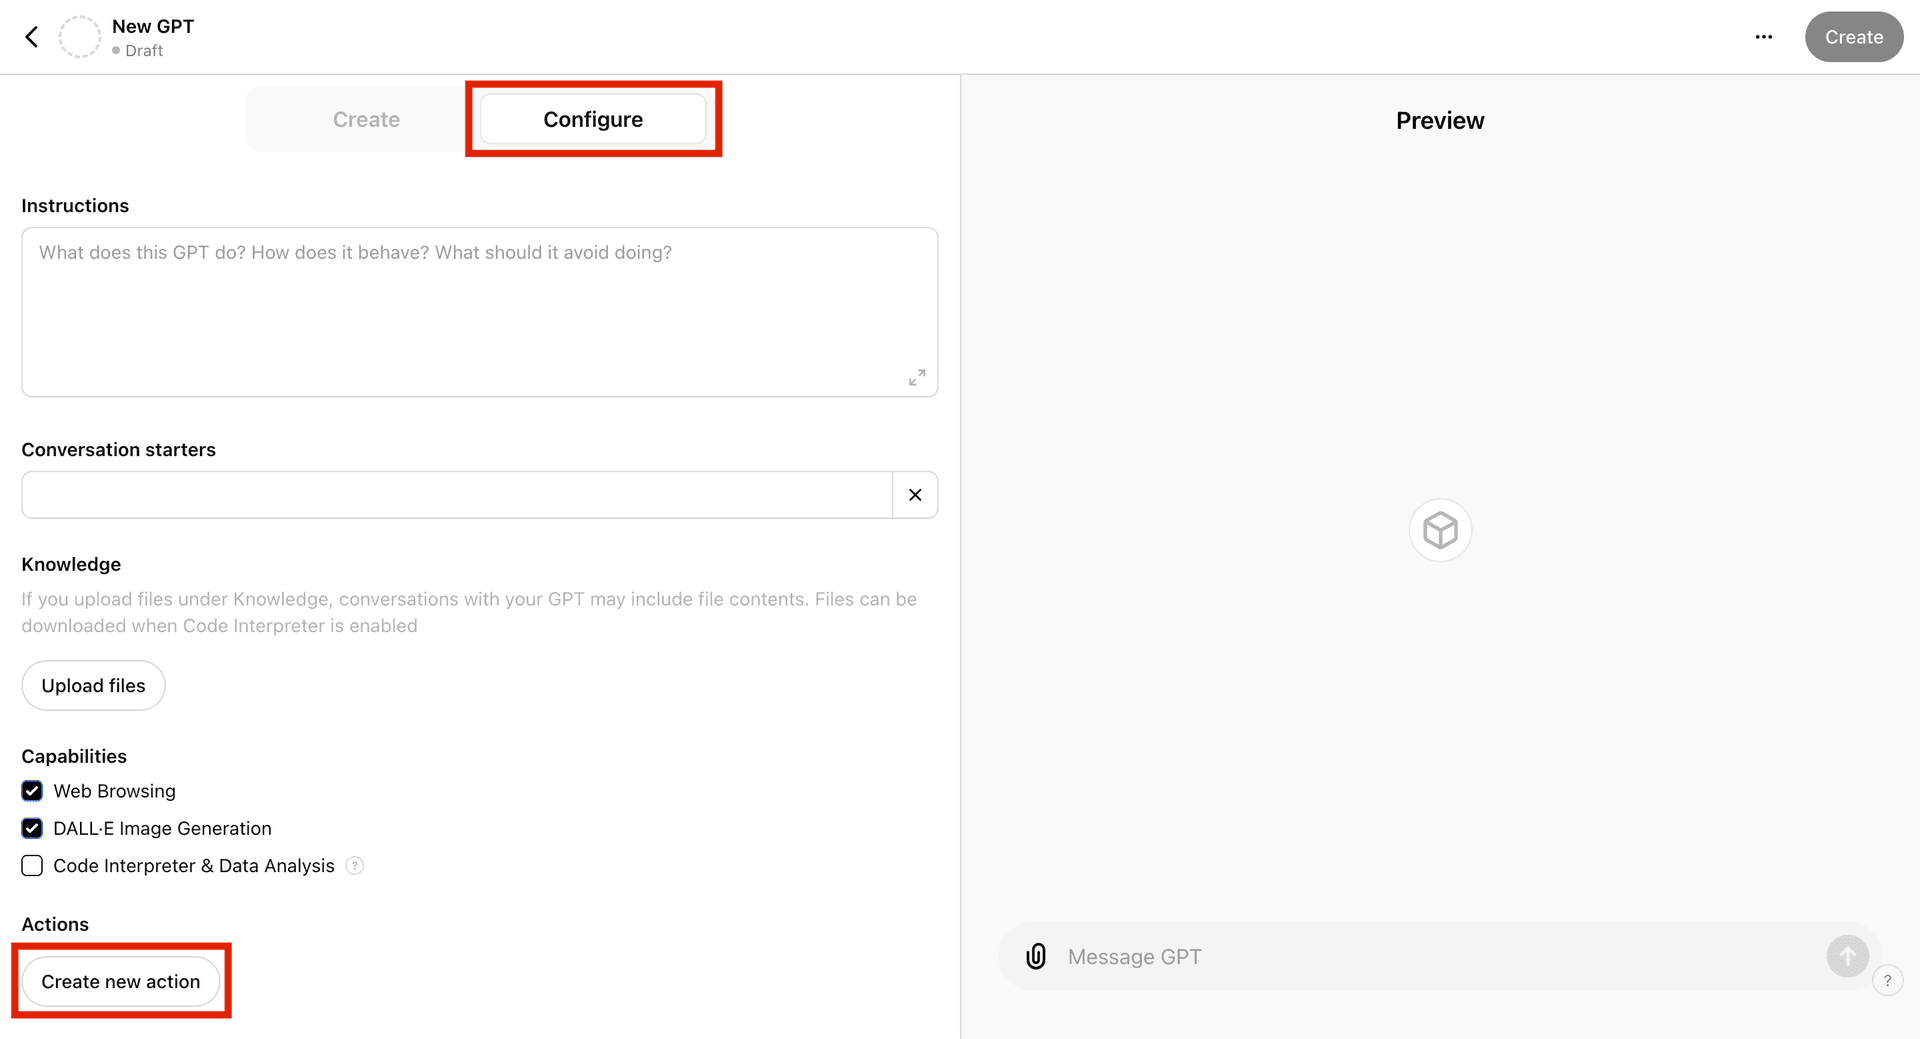
Go to the
Configuretab (You may need to edit "title", "description", "summary" fields to fit your use cases. For example, if you are building a AWS technical support website, you can add a description such as "Everything about AWS cloud computing") -
Click on the
Create new actionbutton
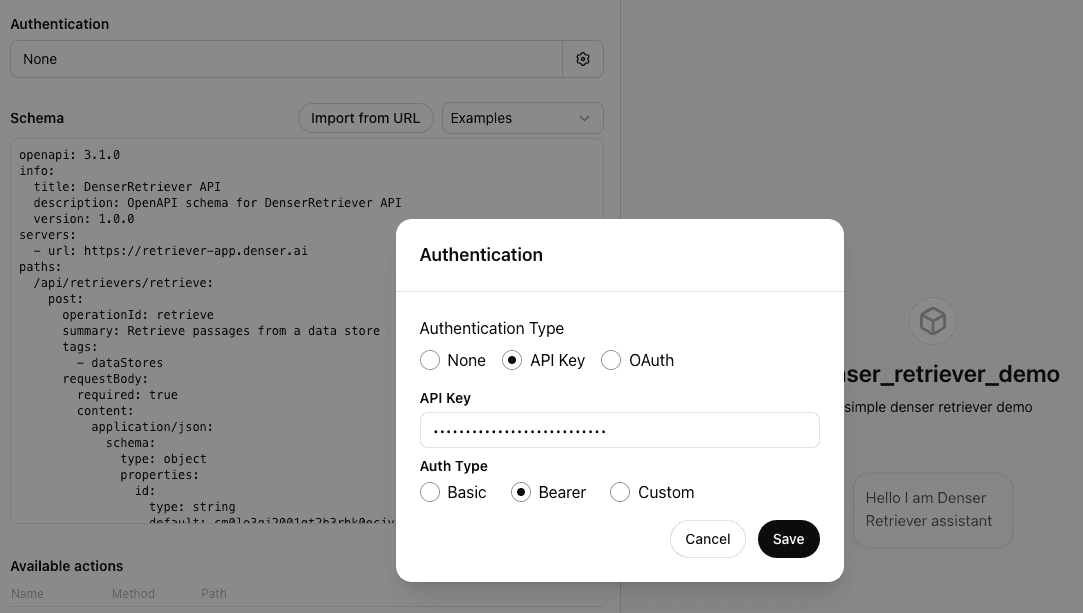
- Add API key to the
Authorizationfield
- Copy the entire schema from the
openapi.yamlbelow and paste it into theSchemafield, Remember to replace<REPLACE WITH YOUR RETRIEVER ID>with your own retriever ID
openapi: 3.1.0
info:
  title: DenserRetriever API
  description: OpenAPI schema for DenserRetriever API
  version: 1.0.0
servers:
  - url: https://retriever.denser.ai
paths:
  /api/retrievers/retrieve:
    post:
      operationId: retrieve
      summary: Retrieve passages from the DenserRetriever
      tags:
        - dataStores
      requestBody:
        required: true
        content:
          application/json:
            schema:
              type: object
              properties:
                id:
                  type: string
                  default: <REPLACE WITH YOUR RETRIEVER ID>
                query:
                  type: string
                k:
                  type: number
                  default: 5
              required:
                - id
                - query
                - k
              additionalProperties: false
      parameters: []
      responses:
        "200":
          description: Successful response
          content:
            application/json:
              schema:
                type: object
                properties:
                  passages:
                    type: array
                    items:
                      type: object
                required:
                  - passages
                additionalProperties: false
-
Add a privacy policy link. For this example, you can using the DenserRetriever Privacy Policy
-
Click on the “Update” button to update the GPT
Test your GPT
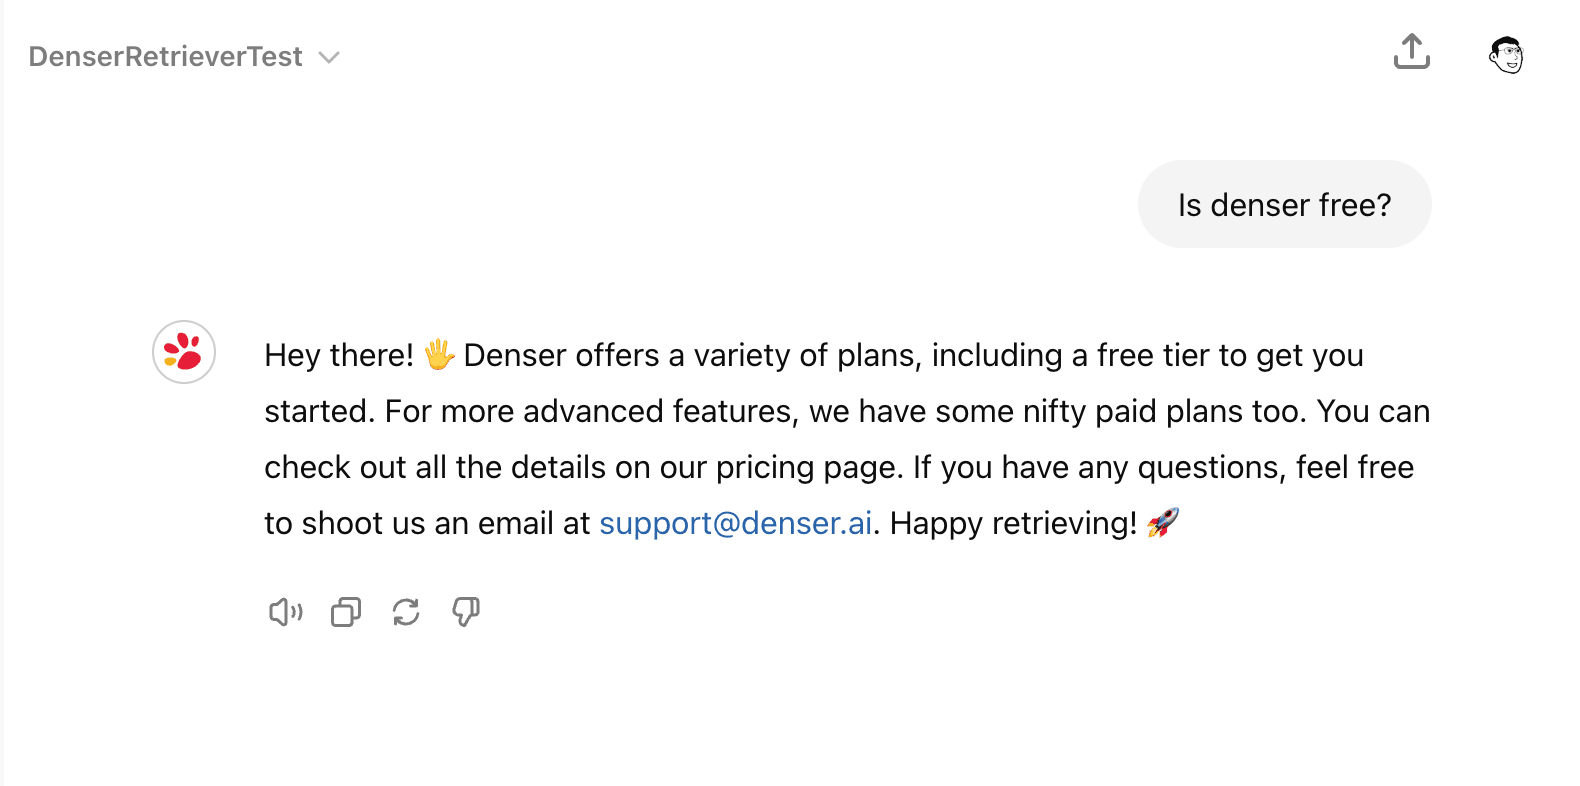
After you have created your custom GPT, you can test it by asking questions and seeing how it retrieves information from your data sources.
FAQ
Do we need ChatGPT plus account to do the tests?
- Yes. ChatGPT plus account is required as you need it to create custom GPT, according to ChatGPT Plus subscription.
How long does it take to index the data?
- It usually takes a few minutes to index the data. However, the time may vary depending on the amount of data you have.
Can I add multiple data sources to the Retriever?
- Yes, you can add multiple data sources to the Retriever. This allows you to organize and manage your data efficiently.
For more specific inquiries, reach out to [email protected].